Subdomains vs. Subdirectories

When you’re first getting started with a new space on a new Web host, you might think of yourself as owning a small “territory” of the Web. Everything you place in your public folder on the server becomes available for anyone on the Web to see (assuming they know the address of your site and the files you’ve placed there).

If you’re just putting up a handful of static, HTML pages which you want to make available to colleagues, friends, or family by sending them links, then working with this large, unorganized space may work. But as soon as you get to the point where you want to organize your site, you’re going to need a new strategy.

Consider this scenario: you want to have a personal blog on your new Web space, where you share pictures and short written pieces with family, friends, and colleagues. In addition, you’re working on a large research project that requires you to build a Web-based repository of digital images related to your discipline. You want to use one application (say, WordPress) to manage your personal blog. For your research project, you’ve settled on another open-source application (Say, Omeka). Both of these are applications that need to be installed on your Web host, but you can’t just put them both at your main domain name – if you did, both sites would quickly experience conflicts and errors. You need to cordon off separate spaces for your different Web “properties.”

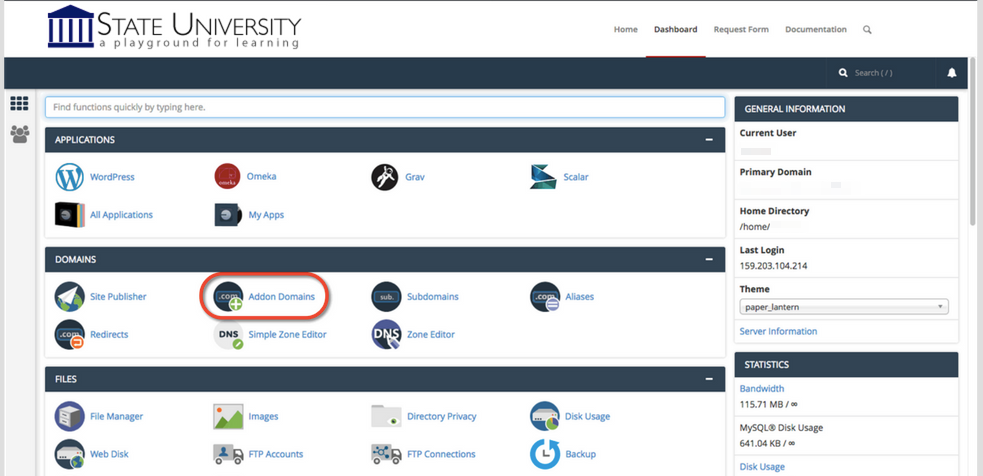
There are two primary strategies for parceling up your Web space. You can create subdomains or subdirectories. But before you can understand the difference, you need to first understand what we mean when we talk about your root domain.

Root Domain

Let’s say you’ve registered a new domain for digital.conncoll.edu called blog.digital.conncoll.edu. Anything that is stored at this core URL is considered to be at the root of your domain. Nothing comes before the address or after the address. You can certainly decide that you simply want to have a single site on your Web host (say a blog running WordPress), and you can set that blog up at your domain’s root. To get to your site in this scenario, users would simply go to blog.digital.conncoll.edu.

Subdomains

When you want to do more than just have a single site at the root of your site, you need to decide now to organize your space. One way to do so is by setting up subdomains.

You’re may already be familiar with the concept of subdomains, even if you don’t know it. Consider Google’s website at https://google.com. As you browse features of that site, you’ll notice that the domain changes. When you’re looking at your Gmail account, for example, the domain changes to https://mail.google.com. Now the root of the url is mail.google.com, indicating that you’re on the part of the site that is dedicated to Google’s mail services.

In this instance, mail.google.com is a subdomain that provides a different utility than google.com. The domains serve two purposes: they help to organize the site from a technical perspective, but they also serve as indications to the users that they are in a new/different space.

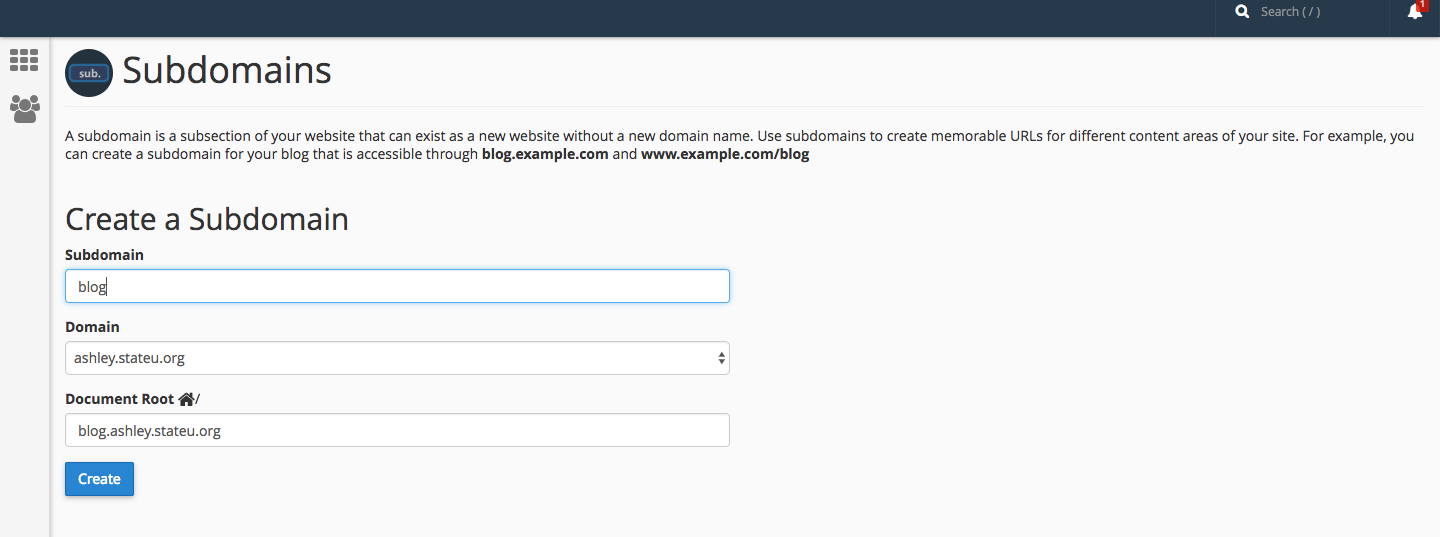
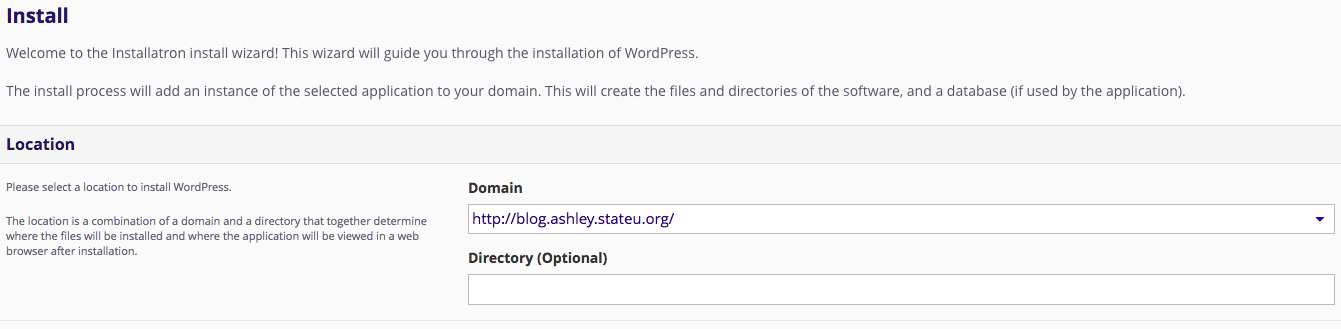
As you work on your site, you’re welcome to create as many subdomains as you like, and in each subdomain you can actually create a distinct, individual Web site.

Subdirectories

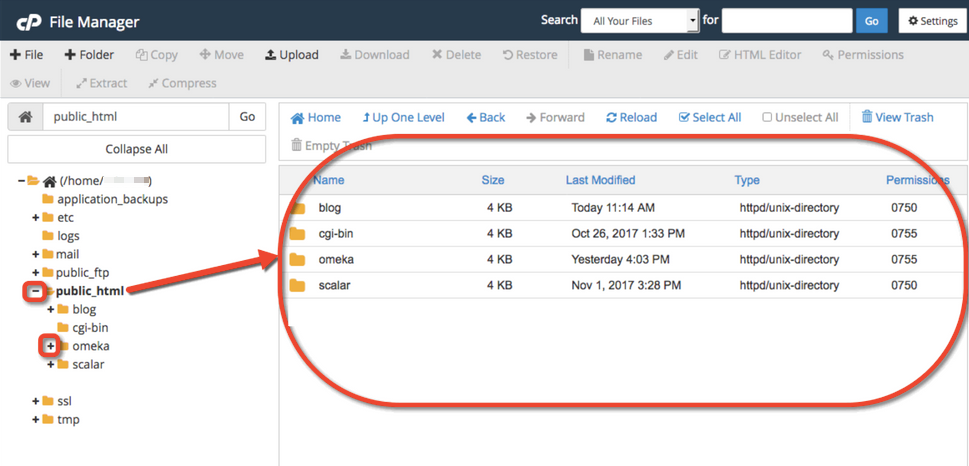
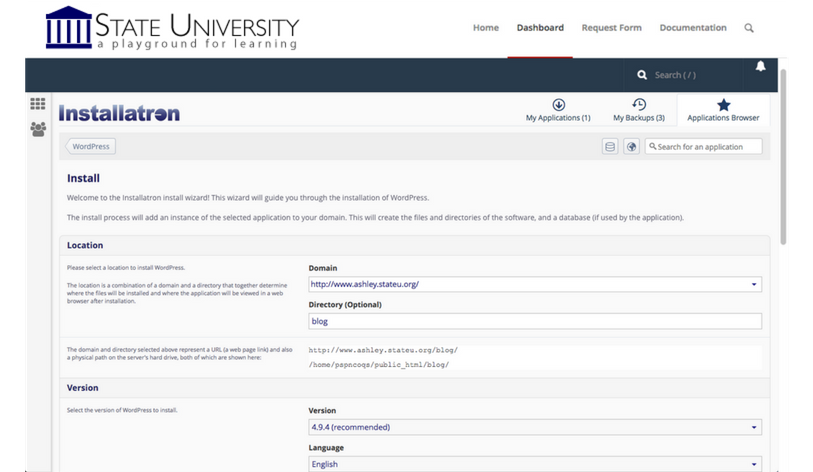
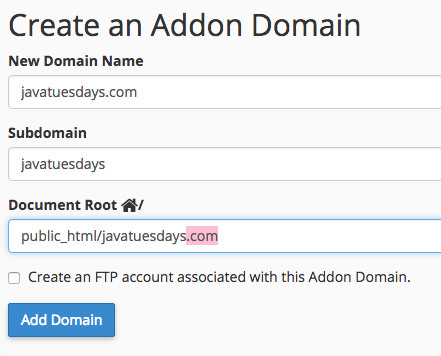
The alternative for organizing your space is to simply set up subdirectories. These function much like file folders on your computer. Instead of creating a blog at blog.yourdomain.com you would place it in a subdirectory called “blog” making the address yourdomain.com/blog. Setting up subdirectory is really easy. You can create folders on the fly when installing applications (like WordPress), and you can also manually create them in your file browser.

There is one particular issue you need to be aware of: Let’s say you’ve installed WordPress to be your primary blog at yourdomain.com. Later, you decide you want to install WordPress again for a separate image gallery site, and you want to place it at yourdomain.com/gallery. But, if for some reason you’ve already created a page on your WordPress site called “Gallery” then the url yourdomain.com/gallery will already be taken. If you try to create a subdirectory of the same name, you’ll get a conflict and errors.

Tips & Review

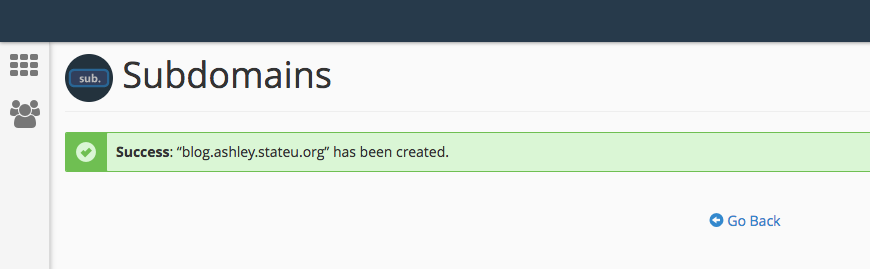
  • Subdomains are generally a cleaner, more elegant solution to organizing your site. You’re less likely to get conflicts or errors. However, when using subdomains the process is slightly more complicated: You must create subdomains first before you can install anything in them.
  • Subdirectories don’t create as pretty URLs as subdomains, but they’re easier to set up. They can, however, result in conflicts with existing Web pages.
  • As soon as you create subdomains or subdirectories to organize your site, you need to consider how people are going to find them. If you’ve created a new primary blog at blog.yourdomain.com, and someone goes to just yourdomain.com, they won’t see that new site. It is possible to set up redirects to avoid this issue. You can also always create links from pages on one subdomain of your site to another.
  • If you really just need one site, sometimes installing at the root of your domain is the easiest thing to do, at least as you’re getting started. You can always add more pieces to your territory later with either subdomains or subdirectories.

Tutorials

Setting Up Subdomains

A subdomain is one way of organizing and separating content on your site. To create a subdomain, use the following steps:

  1. Log into digital.conncoll.edu with your Digital Connecticut College username and password to access your cPanel.
  2. Once logged in, you’ll be at the homepage of your cPanel. The easiest way to navigate your cPanel is using the search feature in the top right panel. Click the Search box and type “subdomains” (without the quotes). When you press enter, you will automatically be taken to the Subdomains page. Or, you can scroll down and click the Subdomains icon under the Domains section of cPanel.
    screen shot of subdomains application
  3. Choose a name for your subdomain and type it into the Subdomain box. Just like top-level domains, subdomains can only contain numbers, letters, and hyphens, and the best subdomains are simple, short, and descriptive.
  4. Once you’ve typed in a name, cPanel will automatically populate the Document root field for you. This will create a folder to contain your subdomain’s files. You’ll usually want this folder to match the name of your subdomain, so it’s easy to identify where different files live in your account. You might want to change the document root if you already have a folder in your account that has the same name as the subdomain you are trying to create, although this should be rare. Once you’re done, click Create.
  5. Once you’re done, click Create. If everything went well, you should see a message that your subdomain was created successfully.

Your subdomain will now be available as an option for automatic installation of various software (WordPress, MediaWiki, etc). If you prefer to install web applications manually, you can do so in the document root (folder) you created in step 5.

Setting Up FTP

There may be times when you need to upload files to your website in the Digital Connecticut College web hosting environment. There are a number of scenarios when this might be necessary:

  • You’re working with an application that allows you to install plugins/extensions, but the files need to be manually added to your file manager in order to install them. (Note: This is not required for WordPress which allows you to install themes/plugins through the WordPress dashboard.)
  • You’ve developed a custom site/pages using a Web design program, and you need to upload the files you created to your file manager
  • You’re installing an application that isn’t part of applications list in Installatron.

One way to upload files is by using the File Manager that is part of cPanel. However, sometimes you’ll find it easier/necessary to use File Transfer Protocol (FTP) to move files to your site. This can be particularly useful if you’re working with a Web space where you’re not the owner (so you don’t have access to the File Manager in cPanel) or if you need to provide file access to someone else to your space on the Web server. File Manager also only allows you to upload files one by one, so if you’re working with large amounts of data then FTP will be preferable.

What exactly is FTP?

File Transfer Protocol is a method that allows you to remotely move files to a Web server from another location – usually your local/personal computer. Using a pre-defined FTP account (with a username and password), you can configure an FTP client (a program you run on your computer that allows you to transfer files via FTP.

There are lots of FTP clients that you can use; some are free and some are not. A few free ones you might consider:

For the purpose of this tutorial, we’ll show you how to set up FTP in FileZilla, (Cyberduck instructions can be found here) but you should be able to generalize these instructions to use in any FTP client.

Get Information about Your FTP Account

If you’re connecting via FTP to your own space on Digital Connecticut College, or if you’re setting up an FTP account for someone else to use, you’ll need to start by getting the proper FTP credentials from cPanel:

  1. Login to digital.conncoll.edu.
  2. In the Search Box at the top of the page, search for “FTP”, and click the FTP Accounts icon that appears.
  3. Every cPanel has an FTP account by default, and you can find those credentials by scrolling down on the FTP Accounts page. You also have the option to create a new FTP account, which can be done by filling out the Add FTP Account form with a username and password. Unless you change it, the new FTP account will be limited to a directory with the same name as the account you’re creating. You can change this to a different directory, if you want to grant this account access to a different location.  NOTE: Make sure you know/remember the password you enter. When you’re done, click Create FTP Account.
  4. Once you’ve created the new account, you’ll see it appear in the list at the bottom of the FTP Accounts page. In addition to any accounts you’ve created, in the Special FTP Accounts section, you’ll see the default FTP Account. You’ll know this account because the username corresponds to your cPanel username. This FTP account has full privileges to access all directories within your cPanel.
  5. For whichever account you need credentials for, click the Configure FTP Client link.
  6. Write down the username, server, and port information that appears. You will need to use this (or you will need to provide this to the person you are giving FTP access) along with the password you created in Step 3 in order to configure your FTP client.

PLEASE NOTE:

For cPanel’s default FTP account, use the following settings:

-Connect via SFTP (more secure than FTP)
-Port: 22

For an FTP account that you manually created (shown in Step 3 above), use the following settings:

-Connect via FTP (cPanel doesn’t allow an SFTP connection for manual accounts)
-Port: 21

Configure FTP in Your FTP Client

Below are links to tutorials for setting up both FileZilla and CyberDuck to connect to your FTP account.

For further assistance on FTP, read this guide.

WordPress Export/Import

If you are using your WordPress, you can also get an export of your posts, pages, comments, custom fields, categories, and tags.

The WordPress export is great for grabbing the content of your WordPress site so that you can import it into another WordPress host, such as WordPress.com or WordPress.org.

Note: Exports do not include plug-ins, or other site customizations.

Exporting

  1. From the Dashboard navigate to Tools>Export
    The screenshot below shows how to export all of your posts, pages, comments, custom fields, terms, navigation menus, and custom posts. However, you can also export just certain posts, pages, or media. The export page within WordPress

This export process generates an XML file of your blog’s content. WordPress calls this an  eXtended RSS or WXR file.

Note: This will ONLY export your posts, pages, comments, categories, and tags; uploads and images may need to be manually transferred to the new blog. If possible, do not delete your blog until after media files have successfully been imported into the new blog.

Importing

Once you have exported your posts, pages, etc., you can import them into your new WordPress site.

  1. Login to your new WordPress.com or self-hosted WordPress site and go to the Dashboard.  From there navigate to Tools>Import and click on the link to “Run Importer
    Screenshot showing where to find the WordPress Importer
  2.  Next you will see a screen that prompts you to upload the WXR (.xml) file you generated through the export process. Browse to your exported WordPress archive and then click the “Upload file and import” button.
    Upload file and import
  3. Choose and upload your file.  You will then be prompted to assign an author to the posts that you are importing.  You can use this function to assign one author to all posts, or you can manually set the author for each post in the posts menu. Unless you have a space limit, you will also want to select the option to “download and import file attachments” before clicking the “Submit” button.
    Select desired import options and click the
  4. When your import is complete, you will see a confirmation screen.
    Confirmation screen

Your exported content is now added to your site. If you had posts on your site prior to importing, those posts are still available.

Because the export did not include themes or plug-ins, you will need to reinstall those separately from the export/import process.

File Structures and the File Manager

Web hosting is, at its basic core, files and folders on a computer that is connected to the internet and setup to distribute them. How that computer (typically a server) is set up to do that is covered more in LAMP Environments but this article will explain the idea of the file structure and how it relates to what you view on your domain.

When you signed up for your domain, a web hosting account was created. Although you typically will interact mostly with the web interface to create subdomains, install applications, and other common tasks, you might occasionally also need to work directly with the files in your account. The File Manager in your cPanel is one way to see these files. You can also create an FTP account in cPanel and use an FTP program to interact with these files (FTP stands for File Transfer Protocol, and it’s a way of using a desktop client to transfer files to and from your Web server space).

Let’s take a look at the File Manager built into your cPanel to get a better understanding of the file structure that makes up your website(s).

  1. Login to cPanel with your Digital Connecticut College username and password.
  2. On the homepage of your control panel, you’ll have all the various tools listed. You can easily find the File Manager by using the search tool in the upper righthand corner and typing File Manager. You can also find its icon under Files.
  3. You are now sent to the File Manager and can navigate the folder structure there.

You’ll notice when the File Manager opens up that this looks very much like a folder on your computer. There are a few folders in it as well as files, and you can navigate down into those folders and see what’s inside of them. At the top level of the File Manager, you also have the option of interacting with files and folders you select by moving them around or removing them. There is a larger article all about how to use the file manager at Accessing Your Files through the File Manager so we won’t talk much about how the interface works here. Instead, we’ll cover what those folders and files actually mean and how they relate to what someone sees when they visit your website.

By default, you have a variety of folders at the root of your web space (the first screen you see when you open up the file manager). Some of them are created automatically to store information about the panel and setup of certain sites. These folders are things like access-logs, etc, ssl, and tmp. You can safely ignore most of those folders because they don’t correspond to actual websites. Let’s look at which folders do and how it all works.

Your main domain will correspond with a folder called public_html. Whatever files and folders are inside of this folder are available on that main domain. If you installed WordPress here you’ll likely see a lot of WordPress-related files within it (which were probably helpfully put there by the automated installer). Let’s say we uploaded an image called mypicture.jpg directly into the public_html folder. That image would now be available at yourdomain.com/mypicture.jpg. The slash after your domain implies “this file is inside this folder”. But what if we had a folder inside the public_html folder? How does that appear? This is typically called a subfolder so let’s put a folder in public_html called “images” and put our image, mypicture.jpg, inside of that folder. What would you type in a browser to get to that file now? The location would be mydomain.com/images/mypicture.jpg. So subfolders are also indicated by a forward slash after a domain.

What about subdomains? You can have completely separate sites called subdomains that appear as nameofsubdomain.yourdomain.com. But where are they in the file structure? When you create a subdomain, cPanel will ask you to give the subdomain directory a name. If I had a subdomain called photos.mydomain.com for example, I might want to name the folder “photos” (by default your control panel will call the folder by the name of the subdomain). Folders for subdomains are located inside the public_html folder. So when you go to the File Manager and navigate to public_html, you’ll see folders listed for all of your subdomains and once you navigate inside one of those folders, you’ll see files and folders specifically for that subdomain that appear on the web at that subdomain’s address.

File Manager in cPanel is great to view these files and folders, but it can be limiting if you want to upload an entire folder of information to your website. If you find yourself wanting to do more with the files and folders on your web space you may want to consider using File Transfer Protocol (FTP). FTP will allow you to upload and download files to and from your File Manager (i.e. your website) in bulk. For information on using FTP, click here.

Installing Applications with Installatron

Installatron is a script installer that allows you to quickly and easily install Web applications to on the Web space. By default, when you use Installatron, the application you add will be automatically upgraded whenever a new version is available (and a backup will be kept, just in case).

Installing Applications Using Installatron

  1. To get started you’ll need to login to your control panel by going to https://digital.conncoll.edu/dashboard/.
  2. Here you’ll log in with your Digital Connecticut College username and password.
  3. Once logged in you’ll be on the homepage of your control panel (cPanel). You will need to scroll down until you see a section of your cPanel labeled Web Applications. Within this section, you will see a link to the Installatron which you should click. Or, you can type “installatron” (without quotes) into the search bar.  When you press enter you will automatically be redirected to the Installatron page.
  4. A listing of all of the applications you can install by default in Installatron will appear. Navigate to the one you want to install, and click the icon.
  5. After clicking the icon, a page will appear with information about the application, links to resources, and a link to install it.
  6. Click Install this application when you are ready.
  7. A page will appear with a number of settings you can choose/change. The image below shows these settings; here is a rundown of them:
    • Location: You’ll need to choose where to install your new application. You can install it at the root of your domain or in a subdomain (which you need to set up first). In addition, you can place your application in a folder (in either your root domain or a subdomain)
    • Version Information: You can choose a version of the application. Generally, we recommend choosing the default version. It is likely to be the most recent, stable release.
    • Updates & Database Management: By default, the system is set up to automatically upgrade (and create backups upon upgrading) all applications. In addition, by default, the database will be set up for you automatically. We recommend NOT changing these options.
    • Username/Password: An username/password will be automatically generated for you. You can choose to change this if you like.
    • Click Install: After installation, you’ll be taken back to the main Installatron page, with details about the application you just installed. At any time you can come back here to review the application details, back it up manually, or uninstall it.

To get to your new site, you can click the “website” link. What’s more, with certain applications you can use this space to log in to the admin area.

In addition, you’ll have received an email with your username/password and a link to your new site.

Registering a Domain

Digital Connecticut College currently utilizes both subdomains of .digital.conncoll.edu and top-level domains (a .com, .net, .org address) for the initial signup. You have the option to start with a free subdomain and then later decide you’d like to purchase a top-level domain after using the space.  You can do this by registering a domain with a service provider (we make a recommendation below, but any domain provider should work) and adding it to your space as an Addon Domain.

To start you’ll need to get the domain registered. When choosing a domain we recommend keeping it all lower-case, avoiding hyphens, keeping it short, and of course it will need to be a unique address. Reclaim Hosting has made the process of registering a domain quite simple, and the domain will work with very few additional steps due to the integration they have with our hosting system. To register a domain, click here and type in the domain you’d like to purchase:

screenshot of domain registration at reclaim.com

After ensuring the domain is available for purchase you’ll be prompted to select whether you’d like to protect the contact information associated with the domain. This option (referred to as ID Protect) used to cost an additional $7, but it is now free. We recommend checking this ID Protect box to protect your contact information.

You’ll also be prompted for nameservers for the domain. If registering the domain through Reclaim Hosting you can leave these with the default. If you decide to register the domain elsewhere, you’ll want to point the nameservers to ns1.reclaimhosting.com and ns2.reclaimhosting.com in order for the domain to work with our system.

Once you’ve completed the checkout process with payment information the domain will be registered automatically. The last step is to add it to your existing account here at Digital Connecticut College. To do that you’ll log into your account at https://digital.conncoll.edu/dashboard. Navigate to your cPanel > Domains > Add-on Domains.

-On the following page, type your newly purchased domain in the new domain name field. (The subdomain and Document Root fields will populate automatically.)

-You can change the document root (the directory of your files) if you wish. Some like to remove the “.com” from the Document Root field for the convenience when using FTP.

-The option to create an additional FTP account is present but not necessary.

-Once the domain is entered click Add Domain to add the domain to your hosting account.

At this point, the domain will now be hosted in your account and you can use it to install software, upload files, and any number of other actions available to you in cPanel.

Social Media

As you begin to build out your digital presence you’ll probably start to think about social media in some form. In fact it’s likely that you already have at least one, if not more, social media accounts (Facebook being the most popular to date). Everyone uses social media in different ways, and although it’s often interesting to see people break the boundaries of the “social norms” of a specific online community, this article will focus more on the accepted use cases for specific social networks and how they can help you build your digital presence. This is by no means a comprehensive “How To” guide for Twitter or Facebook, but a good starting point for thinking about where you best fit into these online communities.

Facebook

The majority of folks that will read this likely have a Facebook account. With over 2 billion active users it’s by far one of the more popular social networks. Many treat Facebook as a semi-personal space, one reserved for family and friends to share photos and highlights of what’s happening in their lives. Facebook also supports “Groups” for sharing amongst a smaller set of individuals regularly, and “Pages” which are less personal and more public-facing profiles meant for organizations and businesses. There are plenty of applications that make it easy to publish a link to the work you do on your blog and your participation in other networks back into your Facebook profile.

In general, it’s a good practice and can often lead to interesting conversations with different groups of folks. This practice of publishing elsewhere and then feeding into Facebook is desired over the alternative, using Facebook for all content and then pushing it out to other communities. The main reason for this is that privacy concerns over how different people can view content on Facebook have changed often enough to leave users concerned. There’s also never any certainty of sustainability with any of these social networks (remember MySpace or Friendster?) no matter how popular, so publishing in your own space and then pushing out to others makes a lot of sense. The key takeaway is that Facebook is a great personal network and can also be the starting point for some of these larger professional discussions should you decide to use it that way.

Twitter

While no longer the new kid on the block, Twitter has only relatively recently started to gain momentum. It doesn’t have nearly the same user base as Facebook (though there are about 500 million accounts to date) and the way people use it is very different. Twitter has focused on the short status message from the start, before Facebook even integrated the idea into their platform. Users are limited to 280 characters. It’s a conversational platform for interacting with people. It’s used heavily at conferences and many choose this as a social network for really networking with peers and others in their community as well as people they might not ever meet in real life. You can follow as many people as you want and it’s a great way of having a stream of information about “what’s happening” with people and groups you’re interested in.

One powerful development of Twitter is that celebrities have begun to embrace it as a way to speak directly to their fans without having the message interpreted through other media and journalism with a slant. The ability to search various topics or hashtags (keywords) and see a running stream of what people are saying about that topic is also a very powerful way of gauging reaction to ideas and events. It’s a great idea to experiment with a Twitter account by signing up, adding a profile picture and information about yourself, following a group of people, and interacting with it daily. While the gratification may not be immediate, it’s one of those social networks where the more you put into it the more you will get out of it.

LinkedIn

LinkedIn is the professional resumé of social networks. It mixes the ability to keep an updated resume of where you work and what your accomplishments are with a social aspect of having people recommend you and comment on your work. Most users find LinkedIn helpful not as a day-to-day network they use, but rather when they’re searching for a new job and want to find people they know that might have connections. The old saying “It’s who you know” when finding a job or making a connection is particularly relevant here where those connections can be exposed to you. (For instance: you may know a person who works for the company of one of Bill Gate’s sons, and the VP went to high school with you).

Summary

As mentioned in the opening paragraph, talking about social media is an ever-changing and moving target and this article can never be truly comprehensive. The goal of Digital Connecticut College is to have you thinking more critically about where you put your content, not that you don’t participate in these networks which still have a lot of value, but rather that you own the work you create. Facebook, Twitter, LinkedIn, and others all have different audiences and the more places you push your content to, the more opportunities for discussion and feedback you’ll receive. The ability to network with an increased amount of people that isn’t reliant on face-to-face meetings is a powerful change in how we interact on the web and the value of it. As you begin to explore social media the best recommendation would be to choose a space you want to explore and really dive in. Follow as many people as possible, engage with them, respond to their work, and you’re more likely to get responses in return that start to build that sense of community for you.